Patient Joint Guide - How to Roll a Joint
Learn how to roll a joint step by step, from gathering papers and grinding flower to making a filter, rolling, lighting evenly and saving a joint for later.
By Bloom Team
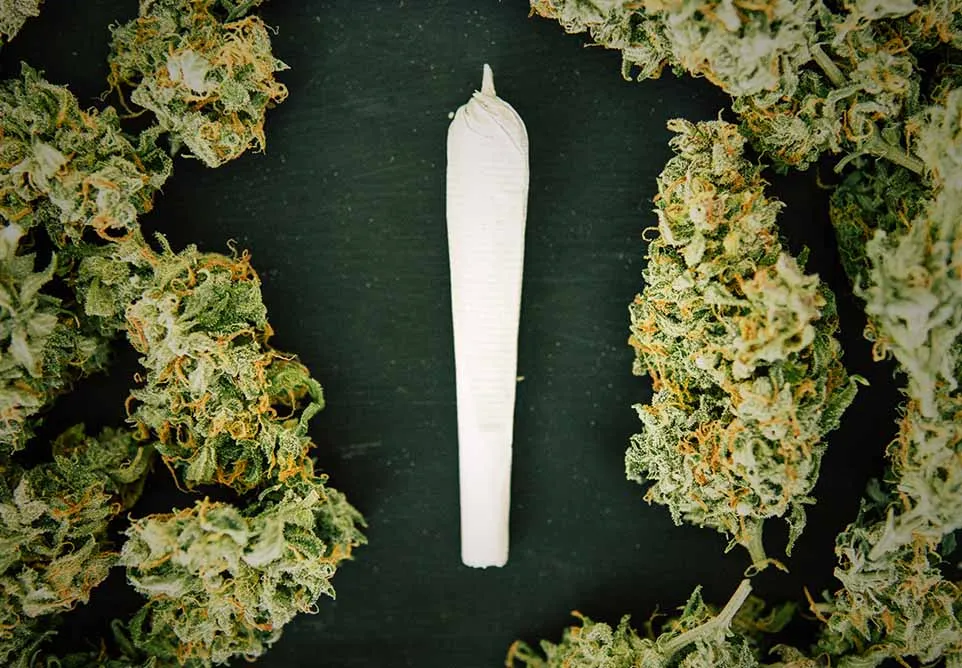
The process of rolling the perfect joint can be a relaxing and therapeutic experience in and of itself. Rolling a joint is also one of the easiest ways to enjoy your cannabis. All you need are some rolling papers, cannabis flower, and maybe a small piece of card stock paper to create a filter. Perhaps its simplicity is why it has become one of the most popular ways to smoke marijuana.
Although cannabis has been smoked or vaped around the world for thousands of years, the idea of a cannabis joint is relatively new in the history of cannabis.

The process of rolling the perfect joint can be a relaxing and therapeutic experience in and of itself.
- Gif from: Giphy
A pharmacist at the University of Guadalajara in Mexico seems to have been the first to document a cannabis joint in 1856. According to him, laborers were mixing cannabis and tobacco in their cigarettes. (1)
So, for at least 166 years, people around the world have enjoyed the relaxing experience of rolling and smoking a joint. And so can you.
Don’t worry if you have little rolling experience. Today we’re going to provide you with the basics of what you need to know to roll a joint. But before we get to that let’s clarify a question some might be wondering.
What Is a Joint?

A joint is a rolled cannabis cigarette. Other names for cannabis joints include doobie, pinner, and fatty. Most joints are hand rolled, but they can also be rolled with the use of rolling machines.
Joints are wrapped in rolling papers made from various plant fibers including hemp, rice, flax, or wood pulp. High quality papers can help to smooth out the flavor of your joint.
The Difference Between a Joint and a Blunt
Instead of being wrapped in rolling papers, blunts are rolled with cigar paper. Besides that, blunts will tend to be larger and contain more cannabis than joints. Learn more about the difference between a joint and a blunt.
Speaking of how much cannabis each contains, that brings up a question some of you might be wondering.

How Much Weed Is In a Joint?
Like most things related to cannabis consumption, the “right” choice will be different for all. Some may feel that a larger joint is perfect, while others might prefer a smaller joint.
So, when it comes to how much cannabis should go into your joint it’s a personal decision.
With that said, here are some general guidelines.

A 2014 report from the White House estimated that the average joint contained .43 grams of cannabis flower - with other studies estimating the average joint could contain up to .75 grams. (2)
Another study conducted in 2016 examined data collected from over 10,000 cannabis transactions during an 11-year period in more than 40 communities. The study found that the average weight of cannabis in a joint is estimated to be .32 grams. The results of this study were published in Volume 165 of Elsevier’s, Drug and Alcohol Dependence, August 2016. (3)
These results may surprise some since many pre-rolled joints sold at dispensaries tend to weigh a bit more. For example, individual pre-rolls can contain anywhere between 1.0 - 1.5 grams of cannabis and the pre-rolls sold in multipacks can contain between 0.5 to 0.75 of a gram of cannabis.
Ultimately, the right amount is a personal choice. For most beginners anywhere between 0.3 to 0.5 grams should be a good place to start for personal joints.
How To Roll a Joint - A Step-by-Step Guide

Step #1: Gather Your Supplies
First things first, you will need to gather the required supplies which consist of your dry cannabis flower and some rolling papers. A couple of well-known brands of rolling papers include Zig-Zag and Raw.
If you’re looking to keep your experience as clean and natural as possible, hemp rolling papers could be a good choice - considering they’re usually unbleached and free of additives.
Here are some of the most common sizes of rolling papers:
- Single wides - smallest papers at one inch wide
- 1 ¼ inch wide - commonly used for joints and a good place to start if you plan to include a filter/crutch
- 1 ½ inch wide - good if you are sharing with a friend or if you prefer a heftier joint
- King size - typically wider and longer and are good if partaking with friends

Optional Supplies:
Cannabis flower and rolling papers are the two must-have supplies you need to roll a joint. There are also a few optional supplies that can make rolling your joint easier.
The first is a small strip of card stock paper to create your filter/crutch. Some people will use a small piece of the package their rolling papers come in. Other options include a piece of an index card or manilla folder. The nice thing about using a manilla folder is that one folder can give you enough material to make filters for some time.
Not only can using a filter give your joint some structure to help make rolling your joint easier, it can also:
- Improve airflow
- Help prevent the inhalation of hot pieces of weed
- Help you avoid a soggy joint if you are sharing
- Allow you to enjoy the whole joint without having to use a roach clip to avoid burning your fingers
You may also want to use a grinder to ensure an even consistency of your flower.
Finally, you may also want to pick up a rolling tray. If not, a nice flat surface like a magazine, plate, or even a frisbee can serve as good alternates.

Step #2: Grind Your Weed
Whether or not you decide to use a grinder, you’ll need to find a way to break up your weed. We recommend using a grinder, here’s why.
Using a grinder will break up your cannabis into a nice consistency that can result in better joint structure, slower burning joints, and improved taste. But that’s not it.
Can Using a Grinder Boost the Effects of Your Weed?
Last but not least, using a grinder could boost the potency of your cannabis. That’s because when you break up your weed by hand, the tiny little hair-like structures you see on your flower, known as trichomes, can stick to your fingers. By using a grinder there’s a much better chance those trichomes will make their way into your joints - and enhance your cannabis experience.
Using a Grinder to Collect Kief
Not only can using your hands to break up your flower leave you with sticky fingers that can make rolling the joint more difficult - but you could also end up wasting valuable trichomes.

Each time you use a grinder, some trichomes are left behind. After a month or two, you can clean your grinder and collect those trichomes left behind. This is known as kief, and it can be sprinkled on your flower to enhance your cannabis experience. Learn more about what kief is and how to use it.
Some grinders have separate compartments. For example, some grinders have three compartments - one to grind your flower, another to collect your ground up bud, and another to collect your kief.
Grinders are not expensive but can go a long way in helping you get the most from the weed in your joints.

Step #3: Prepare Your Filter
As we mentioned earlier, using a filter is optional - but recommended. You can buy pre-made filters or you can easily make your own. It won’t take much more than a minute of your time and can go a long way in enhancing your cannabis experience.
As we mentioned, you probably already have what you need to make a filter. A couple of possibilities include a piece of a manilla folder, an index card, or even a piece of the cardboard from your rolling papers.
Let’s say you’ve found some paper with the right thickness. Next, you will want to cut a thin strip measuring about ¾ of an inch wide and 2-4 inches long. Start by folding one end, accordion style, into the shape of the letter W.
We recommend shaping it into an W to create a barrier that will hopefully prevent any loose weed from getting through. Once you’ve made your W, you can roll the rest of your filter paper around it a few times in the shape of a circle.

Step #4: Rolling Your Joint
Lay one piece of rolling paper horizontally on your rolling tray. Make sure the side with the little shiny strip is face up and the strip is on top. Remember, if you don’t have a rolling tray, you can use a plate, frisbee, or magazine.
Next, decide which side you want to place the filter you just created. Some may prefer to place it on the left side of their joint and others will prefer to have it on the right-hand side as they roll their joint. There is no wrong choice, go with whatever feels most natural.
What Type of Joint Do You Want?
Before you start rolling your joint, you will also need to decide what type of joint you want. Do you want a joint that is evenly sized throughout and has a tubular shape like a cigarette? This is your classic style of joint.
The other option is to roll it in the shape of a cone - with one end larger than the other. These are known as bats, due to their shape being similar to a baseball bat.
Since classic style joints are uniformly sized throughout, they tend to provide even hits. Bat-shaped joints, on the other hand, contain more cannabis and less paper towards the ends - allowing you to really savor the flavor of your bud in those first few hits.
Plus, since cone-shaped joints are thinner at the end near the filter, you’ll have less weed and more paper during those final few puffs. That way you won’t feel so bad if you don’t completely finish your joint.
Alright, so now that you’ve decided what type of joint you want, let’s get to it.

Easy Ways to Roll A Joint
Some rolling papers will have a crease in them. If so, you can use this as a guide as to where to place your ground up flower. Now, go ahead and start placing some of your ground up cannabis onto your rolling paper of choice.
If you are rolling a classic style joint, you’ll want to sprinkle your cannabis flower evenly. If you decide on a cone-shaped joint, then you’ll want to place less weed closest to your filter and a little more as you make your way toward the end.
After you’ve placed your flower onto your rolling paper, you’ll need to roll it a bit to give it its shape. You can do this by gently rolling the bottom side - furthest from the gummy strip - between your thumb and forefingers until it reaches the desired shape for your joint.
Once you’ve shaped your joint, you’re ready to move on to what many consider the most difficult part of rolling a joint.

Step #5: The Fold & Tuck
You will want to start your roll at the side nearest to your filter. Gently fold over and tuck the paper around the filter first. Then continue to gently roll and tuck the rest of your paper until you reach the gummy strip at the top.
Now, apply a little bit of moisture. Not too much - just enough to seal your joint.

Step #6: Tap Down
Gaps in your joint will only diminish your smoking experience. So, grab a pen, pencil, chopstick, or wood coffee stirrer. Insert it into the open end of your joint and gently tap down your cannabis so there are no gaps in your joint. Be careful not to pack your weed too tightly because that could restrict airflow.

Step #7: Twist It Shut
If you are ready to enjoy your joint immediately, you can skip this step and move directly to step # 8. But, if you plan to save your joint for later, you will want to close up the open end to avoid any weed falling out.
After tapping down your weed, you should have a bit of excess paper at the end of your joint. Simply apply a little bit of moisture to your fingers and twist that end shut.

Step #8: Light It Up!
Most of you probably already know how to properly light a joint. But just in case, we’re going to explain how to light a joint, so it burns evenly.
When you’re ready to enjoy your joint, hold it in one hand and hold your matches, lighter, or hemp wick with the other.
What’s the Cleanest Way to Light Your Joint?
If you are looking for the cleanest way to light your joint, a hemp wick is a good choice. It can help you avoid inhaling butane from a lighter or sulfur from matches.
Using your preferred method of combustion, keep the flame about an inch or so away from the end of your joint - allowing the twisted end of paper to burn off a bit.
Keep in mind that joints don’t burn the same as cigarettes, so make sure to rotate your joint as you light it. Also, try to make your first few puffs small and even. If there’s still some excess paper on the end of your joint when you light it, don’t inhale the first few puffs.

Ensure an Even Burn
Once your joint is lit, give it a quick look over to make sure it is lit properly. If you notice that the joint didn’t light evenly, you can moisten your finger a bit and gently rub the paper under the side that is lit, to slow down the burn on that side.
Also, taking smaller and longer hits can help your joint burn evenly.
So, there you have it, that’s how you roll a quality joint and light it. But what if you hit it a few times and decide you want to save your joint for later?
How To Save a Joint
Finally, we want to touch on a dilemma smokers can often be faced with, how to save a joint for later.
Before we get to it, we just want to say that extinguishing your joint and lighting it up later, will never give you the same flavor or experience as sparking up a fresh joint. With that said, we understand there might be times where you need to do so.

Here are a few ways you can put out your joint:
- Do nothing - lay it down in your ashtray and allow it to burn itself out
- Give the lit end a gentle nudge against your ashtray to extinguish the cherry
- Suffocate the joint of oxygen by placing it in a sealed jar or joint tube
- Use scissors to cut the cherry off of the end of your joint
In case you are wondering about how to store your half smoked joint - here’s our last bit of advice. The main goals here are to protect your joint from air, moisture, and sunlight. Here are a few ideas on how to store your joint:
- A small glass mason jar
- Blunt/Cone Tube - smell-proof cylindrical container
- Cigar tube
- A pill bottle
Regardless of what method you choose, it is important to store the container with your joint somewhere away from the sunlight and heat.
Practice Makes Perfect

Although it may seem like a lot of work to roll your own joint, the effort can be well worth it. If you don’t get it right the first time, don’t get discouraged. Joint rolling is a skill that can take some practice to perfect. But once you get it right, it’s a skill that can serve you well for years to come.
If after reading all this, you feel that you would rather just buy a pre-rolled joint, there’s no judgment here. Ask your budtender about the pre-rolls currently on the menu.
The Best Way to Medicate with Cannabis Will Be Different for All
Let Bloom Help to Identify Which Way Is Best for You
Gone are the days where smoking a joint was the only way to enjoy the therapeutic potential of your cannabis. Today, you have a wide range of options available.
However, instead of focusing exclusively on whether you should smoke, vape, or enjoy an edible, it’s just as important to find the right balance of cannabinoids and terpenes that work best with your endocannabinoid system.
Doing so could help you get more from your cannabis experience.
Stop by a Bloom dispensary in Ohio or Maryland, and our budtenders can help you find the consumption method and mix of cannabinoids and terpenes that are right for you.
For general information. This post isn't medical or legal advice. Cannabis rules differ between Ohio and Maryland and can change, so check with the Ohio Division of Cannabis Control or the Maryland Cannabis Administration. Talk to a healthcare provider before using cannabis for a medical condition. For adults 21+ and registered medical patients.
More from the Bloom blog.

Education9 min read
What Are THC Drinks? A Complete Guide to Cannabis Beverages
What are THC drinks? How nano-emulsified cannabis beverages work, how fast they kick in, how they compare with alcohol and edibles, and how to dose them.
Bloom TeamNovember 10, 2026
Education5 min read
Cooking with Cannabis: Butter, Oil and Infusion Basics
Cooking with cannabis: how to decarb, make cannabutter and cannabis oil, estimate the THC in homemade edibles, and simple recipes to start with.
Bloom TeamOctober 30, 2026
Education3 min read
Cannabis Topicals: How They Work and How to Use Them
What are cannabis topicals? How creams, balms, roll-ons and patches work, why most don't get you high, how to use them and what to know about drug tests.
Bloom TeamOctober 27, 2026
Earn points, get the deals first.
Join Bloom Rewards free and start with 200 points, plus member-only deals and news from Bloom.
- 200 points for joining
- 1 point per $1 spent
- 100 points = $5
- Member-only deals and drops
Earn at any Bloom in Ohio or Maryland. Pick your store when you sign up.